


Adding bills is one of the most common accounting tasks, and one of the most important.
Whether you’re managing expenses for a property, project, or company, having a clear process keeps your finances accurate and organized.
Here’s what this guide covers:
- Setting up vendors so every payment goes to the right place.
- Entering new bills quickly and accurately.
- Breaking down bill details into clear, itemized expenses.
- Attaching documents for proper recordkeeping.
- Managing and paying bills once they’re saved.
This article walks you through each step in simple terms, so you can handle billing with confidence and consistency.
Step 1: Set Up Your Vendor
Before a bill can be added, you must specify who the payment is going to.
Go to Maintenance > Vendors.
Click Add New Vendor.
Enter the vendor's Name (e.g., "Home Depot") and save.
(Note: A new vendor can also be added directly when entering a new bill.)
Step 2: Enter a New Bill
Navigate to the bills entry screen and fill in the high-level details.
- Go to Accounting > Bills and click Add Bill.

- Vendor: Select the vendor from the dropdown list.
- Dates: Choose the date you received the bill and its due date.
Type: Select Property Bill or Company Bill.
Building: If you selected "Property Bill," use the dropdown to choose the specific building (e.g., "The Griffin building").
Step 3: Add Line Items & Save
Specify what the bill covers and finalize the entry.
Details: Add a description (e.g., "Plumbing"), the amount (e.g., $300), and a category.
Multi-Item: Click "Add more line items" for additional expenses on the same bill (e.g., a $50 door lock fee).
Upload: Attach a PDF or image of the physical invoice for records.
Submit: Click the Submit button to save the bill.
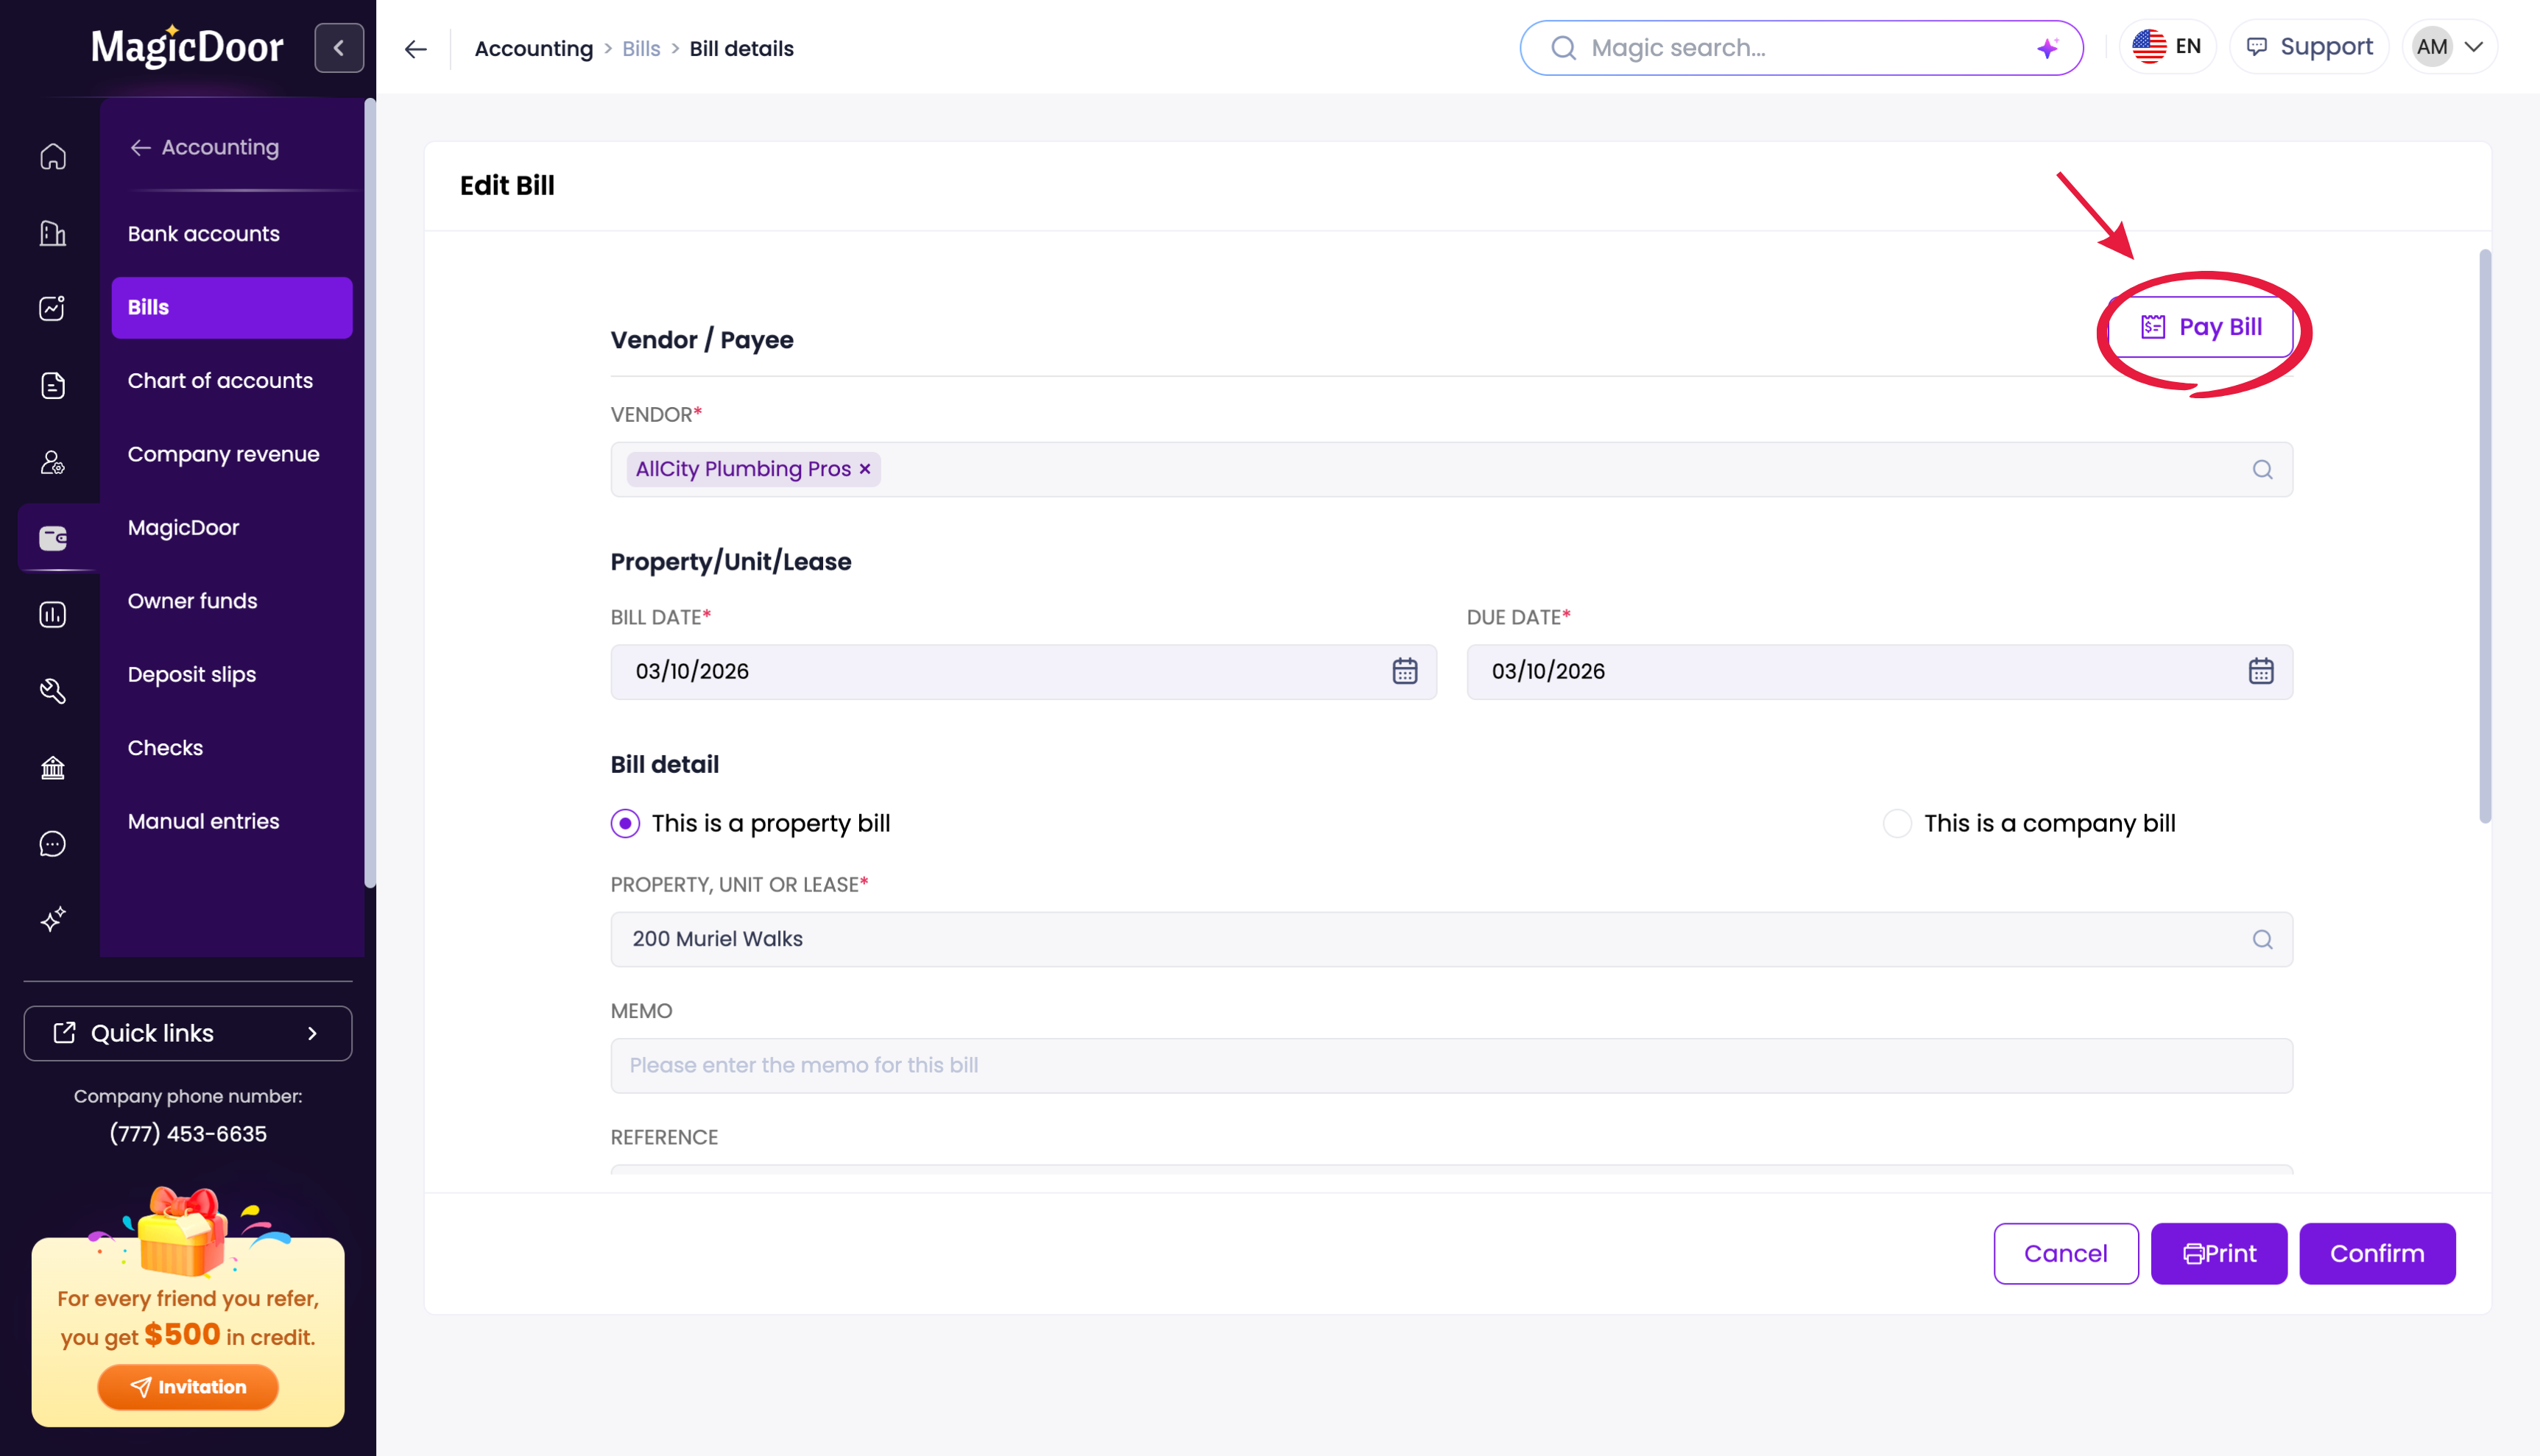
Step 4: Manage & Pay
Once submitted, you can manage the bill from the main list.
Edit: Click any bill in the list to update details or correct typos.
Pay: You can pay a specific bill using the "Pay the bill" option within its details, or use the "Pay Bills" button on the main list screen to handle multiple outstanding invoices at once.
Need More Help With The Accounting System?
If you have questions, our support team is always here to assist.
👉 Contact us anytime at support@magicdoor.com